Creating
Parameterised Report in eclipse
2.
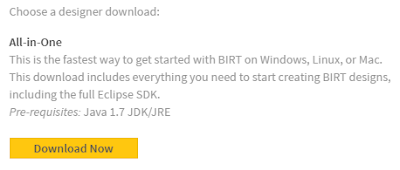
After successfully download of the IDE you will
have a file name called eclipse-reporting-neon-R-win32-x86_64 unzip the file
and Click on eclipse.exe
Then it will show as
3.
Go to New -> Others -> Business
Intelligence and Reporting Tool and Select Report Project as below
4.
Click on next and Give a name for the Project
and it prompts to change the perspective click on yes. Now we can see the IDE
like this.
5.
Right Click on Project Test and New -> Report
and screen should be like this
6.
Now after this we can see like
7.
So we can adjust the width and height of report
by going to MasterPage tab which is down of the report
8.
Go back to Layout. And to the left corner top
you can see a tab Data Explorer Beside Pallaete tab Click on it
9.
Right Click on Datasources to Setup the New DataSource
10.
Here choose the driver which you want here I am
using Mongodb. So Choose MongoDB Data Source and click on next.
11.
Enter the host, database name, port number, username,
password and click on Test connection.
12.
It should show test ping successful.
13.
Then we should create dataset for this go to
Data Explorer and right click on Dataset
14.
Click on next and select the collection name and
below you can see the available fields and we can move which ever fields you
want.
15.
Click on Finish and Ok.
16.
Now we need to create a parameter for the report
so in dataexplorer right click on report parameters and it will show up
17.
Select the fields which ever you want to display.
And click on the ok.
18.
Now we have Data source, Dataset and Parameter.
19.
Now we will attach the filter to the Dataset. Go
to Data Explorer and right Click on the dataset click, on edit click on filters.
20.
Click on new and it will show up like this and
select the column to which we need to filter the data with parameter.
21.
Choose equal to and in the second dropdown click
on the build expression
22.
AS shown in the above select the parameter and
then click on ok.
23.
Click on ok. Now that we have all the data and
we need to populate to the report so in order to do it we should drag a table
from palette and drop into the report
24.
Select the dataset in the dropdown and select
the required fields and click on ok. Then we can see this table.
25.
Now save the report and we need to check the
report by running the report in the eclipse ide Go to Run -> View Report
-> Web Viewer it will display this
26.
Select the field and the report will be
displayed and we can export it into PDF, Excel and word. Hurrah...!
1.
This is a simple example and we can explore more
and do the complex once also. Enjoy Reporting…


